
Friday, December 12, 2014


Well, here goes!
All in all our group is satisfied with our progress and understanding of the design cycle after this project. We are all too familiar with the idea of designing, building, testing, then redesigning after encountering our many dilemmas. All in all it was educational.
Our prototype, which is more functional apart than it is put together, taught our group the dangers of rapid prototyping. We were under the impression that we had taken all the information we needed from the initial tin can prototype, and as such this would function entirely smoothly.
This was clearly not the case, as we ran into dilemma after dilemma due to poor understanding of our fabrication process. Looking back, it is clear that should we have taken the specifications of the laser and accurately identified the (for lack of a better term) bleed along the edges of each part.
Fortunately for us, this is an acceptable conclusion. The struggles identified above are not ones which will disappear in our engineering careers. There will be more difficult problems and even more frustrating prototypes. Team Ping-Pong Ball Launcher (PPBL) understands that while we may not have a functioning apparatus, we have gained more valuable knowledge of our arduino operations and overall mechanics. We took an idea, made it a design, prototyped, redesigned, and prototyped once more.
Team PPBL is very happy with our achievements, even if they look like a pile of parts with a bad past.
Downloadable Parts, Assembly, and Arduino Code
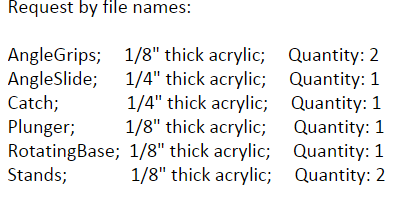
Angle Grips - https://drive.google.com/file/d/0B5uEqaCyiPVySHljd1lOeThWbzA/view?usp=sharing
Angle Slide - https://drive.google.com/file/d/0B5uEqaCyiPVyY1pZSWREc1U2Z1k/view?usp=sharing
Barrel - https://drive.google.com/file/d/0B5uEqaCyiPVyQmtYbmttV3JCUms/view?usp=sharing
Catch - https://drive.google.com/file/d/0B5uEqaCyiPVyY2pqYkVYaU1MeUE/view?usp=sharing
Plunger - https://drive.google.com/file/d/0B5uEqaCyiPVySVh2NDNKMWNBZ2s/view?usp=sharing
Base - https://drive.google.com/file/d/0B5uEqaCyiPVya3oxR2lxRjhqTDA/view?usp=sharing
Stands - https://drive.google.com/file/d/0B5uEqaCyiPVyOFVkVzBCZk5VNDQ/view?usp=sharing
Assembly - https://drive.google.com/file/d/0B5uEqaCyiPVyWlRyaFdKTEh3eFE/view?usp=sharing
Code **includes all versions, past and present
Stepper 1 - https://drive.google.com/file/d/0B5uEqaCyiPVydXhVaGpNRklyZW8/view?usp=sharing
2 Steppers - https://drive.google.com/file/d/0B5uEqaCyiPVyWEpPeTVpTHJUaU0/view?usp=sharing
Stepper/IR code - https://drive.google.com/file/d/0B5uEqaCyiPVydDhKLXBaY0owRkE/view?usp=sharing
Firing Test
Well.... we thought we solved this problem...


The solution method for now is to try and increase the width of the plunger without adding too much friction or irregularity within the barrel.
Close up Mechanism Adjustments...
Angle Slider
The aftermath of the group trying to use a screw eye in the corrugated cardboard. Clearly it didn't hold.


Entire assembly (servo attached beneath)

Once again the heat tolerance of the acrylic was lower than expected, and as such the diameter is several millimeters too small. We did not compensate enough for this effect, and as such our laser cut plunger still rotates inside the barrel, making some interesting test firing... video coming soon!

Laser Cut/3D Print Results
The laser cutting request was submit this past Tuesday.
Rotating Base
Unfortunately, due to a mix up in orders and limited resources, the group could only use a cardboard specimen of the right dimensions (8" diameter) for the design. This proves to be a key factor in the rest of the development of the project.
Notice the duct tape at the end of the slider... The force in testing was such that it tore through.
Additionally, all screw eyes and brackets are no longer usable as they tear straight through the corrugated cardboard, rendering it relatively useless.
The group will attempt to overcome this through whatever means possible.

The key point of the catch is that the notch cut at its very top is so thin the pins we planned to insert may actually break it in use. We are conducting all tests using duct tape as our new bonding agent, as it seems to be the most reliable and less destructive on our cardboard base. This was unexpected, however, could have been adjusted for with better knowledge of the laser we were using.

The stands are by no means a friction fit in the base, however, they fit well enough such that a bit of mounting clay around the joints has them snug.
Unfortunately, in testing it was found that the cardboard allows too much wiggle room between the notches, and is likely to tear...
Videos of this will be posted soon.

Fortunately, the angle slider worked well!
Until it broke the cardboard base.... and a couple springs.

... Please ignore the extra hole.

... Also the IR remote is working, up and down control the launch angle, left and right control rotation, power raises/lowers the catch.

Subscribe to:
Comments (Atom)